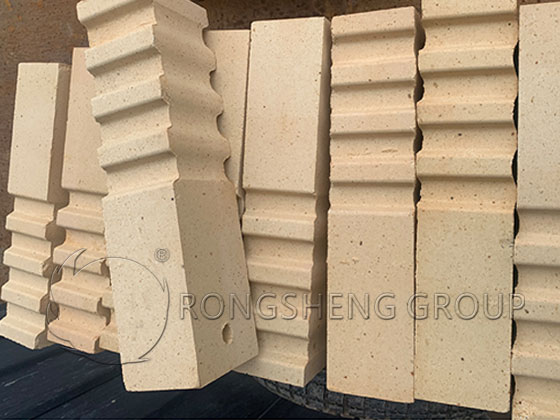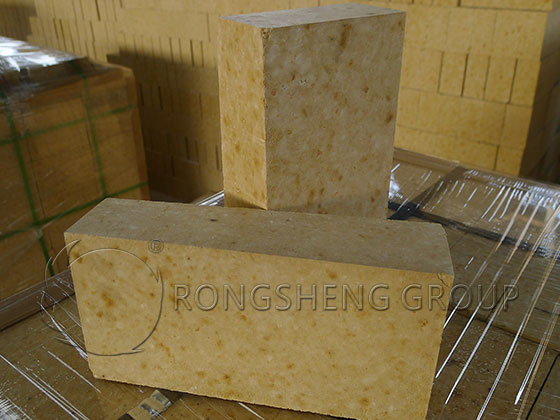
After the lip bricks used in the glass kiln are transported to the rolled glass production plant, if their length exceeds the required length or their surface is not smooth, they need to be processed into the required size using a cutting machine or ground.
Pre-assembly Processing of Lip Bricks
- ① First, cut the lower edge of the lip brick. This should be done gradually and repeatedly to ensure a smooth, flat surface with good curvature.
- ② When processing the upper surface of the lip brick, it should also be done gradually and repeatedly to ensure a smooth, flat surface.
- ③ The bottom of each lip brick must be flat to maintain the stability of the lip brick and the brick frame support.
- ④ After pre-assembling the lip bricks, ensure that the contact area between the lip brick tips is less than 1mm. If the joint is not tight, it must be ground. The back of the lip brick should be as tight as possible while ensuring a tight fit, requiring a gap of less than 1.5mm.
- ⑤ Ensure that the inner dimensional tolerance of the lip brick is no greater than 5mm.
- ⑥ Based on the condition of the lip brick, clearly mark the lip brick’s mouth area using an aluminum alloy ruler and ink line.
- ⑦ Place the processed lip brick near the kiln for baking for at least 72 hours.
- ⑧ After baking, clamp the lip brick and place it on the lip brick support, then install and secure the edge bricks.
Precautions for Lip Brick Processing:
- When cutting the lip brick, leave approximately 5mm of length for processing.
- Use a pneumatic brick grinder for rough processing; for fine processing, an electric diamond-wheeled angle grinder must be used.
- When processing the contact surface of the lip brick, repeated up-and-down finishing is required. Be careful to control the force applied; do not use excessive force.
- When high precision is required for the contact surface of the lip brick, manual grinding with a grinding stone is necessary; do not use an electric angle grinder.
- When using a pneumatic angle grinder, pay attention to the direction of the lip brick to prevent small brick pieces and dust from directly hitting your face. Wear protective gear to prevent facial injury.
- Handle the lip bricks with care, ensuring the lip portion does not touch the ground. Place cardboard on the ground to prevent damage.
- Because lip brick processing is delicate work, requiring one to two days, it must be done promptly so that it can be installed and used immediately upon replacement of the calendering machine.
Lip Brick Assembly
Lip bricks used in calendered glass forming can be made from a single piece or from several bricks joined together. The choice between a single piece and several pieces depends on many subjective and objective factors, such as brick quality, brick cost, operating cycle, glass specifications, and operator skill level. The basic principle is to ensure product quality, prevent defects during use, and ensure durability.
Single Lip Brick
The length of a single lip brick is determined by the length of the calendering roll. The advantages of using a single lip brick are: a. Not limited by glass specifications, meeting the cutting requirements of various glass sizes. b. Good stability during operation, with minimal displacement or tilting. c. Compact, stable, and secure assembly with the support structure. The disadvantages are: susceptibility to breakage, with severe cases resulting in 4-5 cracks. The brick is relatively long and heavy, and assembly and transportation are constrained by space limitations, making them inconvenient.
Two Lip Bricks Assembly
A set of lip bricks consists of two pieces joined together, each piece being half the length of the calendering roll. The advantages of splicing two bricks are: a. It disperses the various forces acting on the lip brick, reducing the probability of cracking. b. Each brick is lighter, making assembly, transportation, and movement easier. However, there are many disadvantages to using two bricks together, including: a. Difficulty in ensuring splicing quality, mainly due to larger joints between bricks and the tendency for misalignment on the upper surface of the lip brick, resulting in overall unevenness. b. Frequent occurrences of widening joints, tilting, displacement, and even misalignment during operation. c. Long assembly cycle, time-consuming and labor-intensive.
There are three splicing methods for two lip bricks:
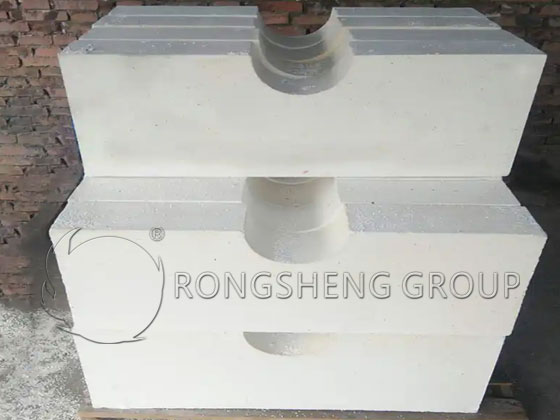
Method 1: Make semi-circular grooves downwards on both sides of the splicing surface of the lip brick, 10mm from the upper plane of the lip. After splicing the two bricks, the semi-circular grooves on both sides of the brick will form a circular hole. Then, fill the hole with mortar, ensuring it is completely filled. After fixing both sides, place it next to the kiln for high-temperature baking for a period of time. At this point, the refractory mortar inside the hole has dried and solidified. If the bricks expand when heated, the resulting cylindrical refractory material will not fall off, sealing the joint between the two bricks. Therefore, no air enters, reducing the release of air bubbles and minimizing the impact on the temperature of the surrounding molten glass.
Method Two: Soak ceramic fiber paper (< 1 mm thick) in molten glass, then apply it to one side of the lip brick. Then, butt-joint the bricks and bake them near the kiln.
Method Three: Dry joining. Butt-joint two well-fitting lip bricks, ensuring the joint is < 1 mm, and then secure them with screws on both sides.
Three-Piece Lip Brick Joining
A set of lip bricks consists of three pieces joined together. The middle piece is 2- 2.2 m long, and each of the two sides has a 250- 350 mm lip brick joint. Its advantages are: a. The two joints release more of the compressive force generated by the expansion of the lip bricks, reducing the probability of cracking. b. The length of the central brick can meet the production needs of various glass specifications. The disadvantages are: a. The structure is unstable, making it difficult to guarantee the quality of splicing; misalignment on the upper surface of the lip brick at the joint can complicate the expansion and contraction of the glass. b. There is a possibility of tilting or displacement during operation. c. Online assembly requires more installation of fasteners, resulting in a longer cycle time.
Precautions for Assembling Lip Bricks
Whether using a single lip brick or multiple lip bricks assembled together, the lip bricks must be assembled, installed, and fixed to the support frame. Production lines using brick-making calenders initially used online assembly, but after a period of trial and error, it was found that online assembly was neither convenient nor guaranteed in terms of quality. Therefore, many companies now use offline assembly. This involves assembling the lip bricks and transporting them to the overflow port using a mobile trolley, then installing and positioning them at the outlet. Production lines using integrated brick-making calenders use offline assembly, meaning the lip bricks are assembled and fixed to the support frame outside the production line, and then hoisted and installed as a whole onto the calender frame.
When assembling lip bricks, the top flat working surface serves as the reference horizontal plane. The lip brick is leveled by processing the brick material or adding leveling shims at the bottom, ensuring the contact surface with the tail brick is perpendicular. The joint between lip bricks must be straight, and the joint should be as small as possible, less than 1mm after assembly. The lip brick nozzle must be perfectly aligned, maintaining a straight line along the tangent. The curved surfaces of the assembled bricks must be on the same plane, without misalignment or steps. Mullite fiber paper is used to separate the lip brick from the tail brick, the lip brick from the edge brick, and the lip brick from the support. The center longitudinal direction of the lip brick is aligned with the production line; the tangent direction is parallel to the edge; and the normal direction is perpendicular to the top plane of the lip brick.
Online lip brick assembly is performed in a confined area at high temperatures. Besides the long operation time (approximately 1-2 hours), the assembly quality of the lip brick with the support and the support with the calender is inferior to offline assembly, and it can also negatively impact the kiln temperature regime.
Offline assembly offers a better working environment, lower labor intensity for workers, does not interfere with brick changing time, and provides ample time and space for assembly. It allows for precise positioning of the lip brick’s front-to-back and left-to-right spacing with the rollers. If the bricks or steel components are unsuitable, they can be processed offline. This ensures the assembly quality of the lip brick with the support and the support with the calender. The brick-loading time is eliminated, and brick changing can be completed within an hour. Kiln temperature changes are minimal, minimizing impact and facilitating rapid production recovery. However, once the integrated brick-making calender is positioned, the tail brick’s relative position cannot be moved, lacking a means to handle defects. In actual production, damage can occur on both sides during the lead-in operation, especially for those accustomed to pulling the lead-in; once the edge is damaged, the machine must be replaced, and the tail brick must be replaced along with the lead brick. Separating the lip brick and tail brick involves long processing times, poor working conditions, and high labor intensity. The heat-resistant steel lip brick support of the integrated brick-making machine has poor deformation resistance, easily bending at high temperatures, and is difficult to restore after deformation for reuse, resulting in waste.